The following explains how to add your logo to every page of your survey.
We suggest you watch the following video tutorial first, and then continue to read the information below the video:
>> Watch the Video Tutorial <<
- To get the Template Editor, go to Configuration->Template Editor
- Create a copy of one of the default templates -- the most common one is just called default
- On the left side of the screen, select the template file called startpage.pstpl:
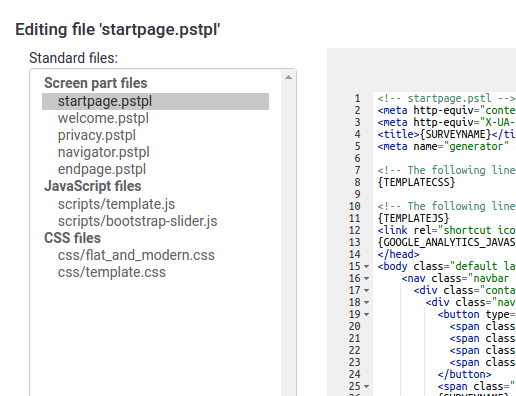
- Look for the line <div id="topContainer" class="jumbotron">
- Create a new line after this
- Paste this code into the new line:
<div class="container"><img id='page_logo' src='{TEMPLATEURL}/files/logo.png'class="clearfix pull-right" /></div>
- You can change the alignment of your logo to left, center, or right by changing the text clearfix pull-right in the line above to pull-left, pull-right, or center-block
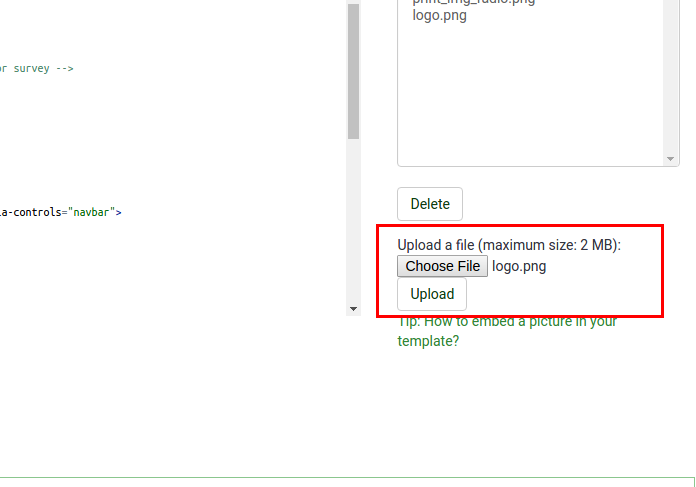
- Scroll to the bottom of the page beneath the code editor, and click the Save changes button.
- Lastly, upload your own logo go to the template editor and upload your logo:
- Make sure your survey is using your new template: Go to your survey, and select Survey Properties-General settings and under Generate options select your new template name, and click Save.
- Preview your survey to see your new logo.
